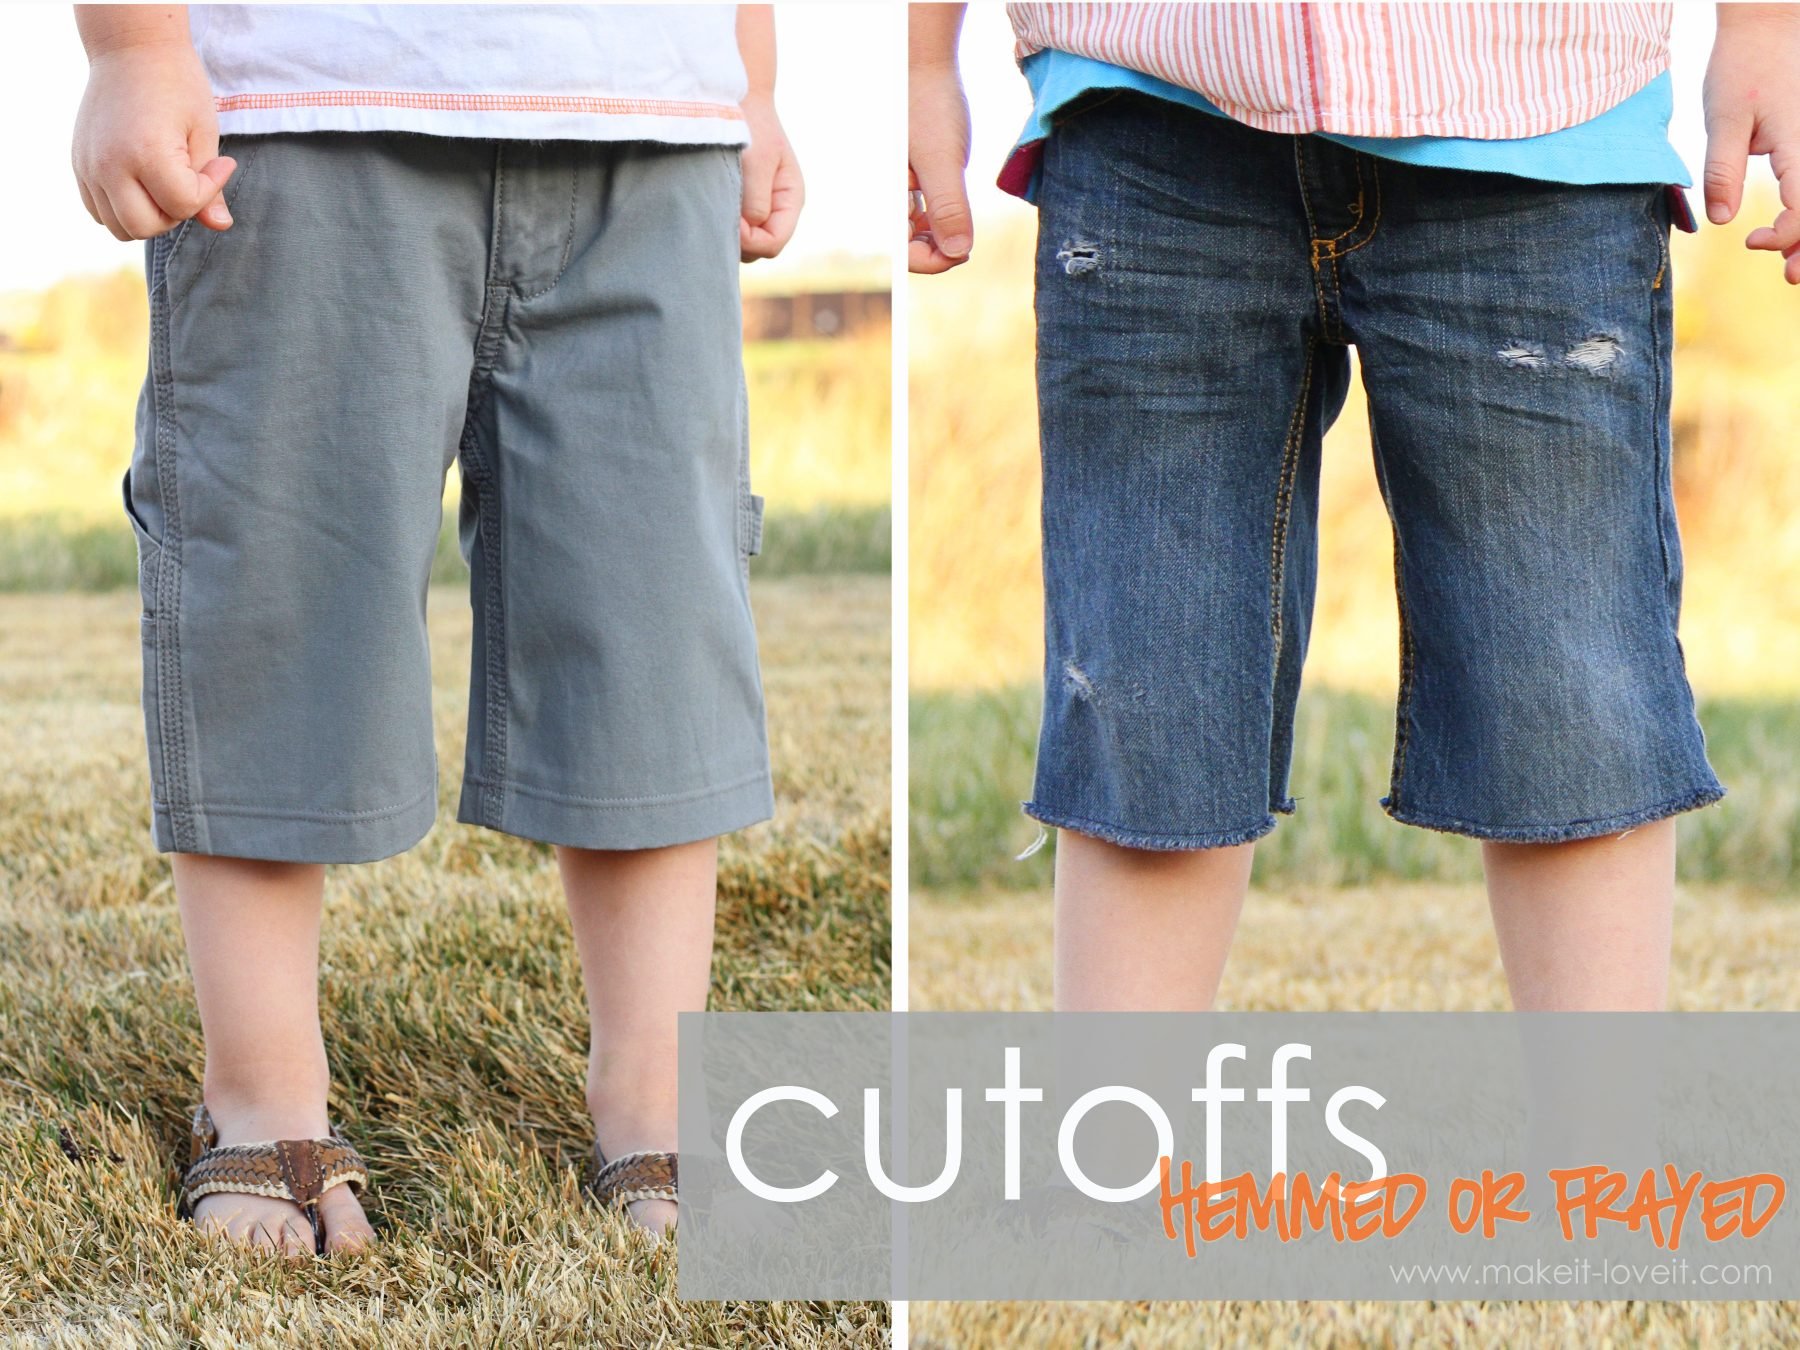
Okay so I had this old pair of jeans, right? The kind that’s comfy but kinda worn out at the knees and thighs. Felt wasteful just tossing ’em. Saw some folks online chopping pants into shorts, figured, “Hey, I can totally do that.” Spoiler: it was messy. Here’s how it went down.
Digging Out the Victims & Gear
First things first, rummaged through my closet. Found two candidates: one faded blue pair and these black jeans I never wear anymore. Grabbed my sharpest fabric scissors – super important, dull ones are useless. Also snagged some tailor’s chalk (a white crayon basically), a ruler, and a bunch of pins. Oh, and an old pair of shorts I like the length of, to use as a guide. Set up shop on the kitchen table.
Marking the Mayhem
Decided to start with the black jeans. Put ’em on, stood in front of the mirror. Used the pins to kinda poke where I thought I wanted the cut. Took ’em off, laid ’em flat on the table. Tried to smooth out the wrinkles. Measured down from the waistband on the outside seam with the ruler, marking dots with the chalk every inch or so. Aimed for about 5 inches down? Used the old shorts to double-check the length against the leg opening. Connected the dots with the chalk, trying to keep the line straight-ish. Key mistake number one: I forgot jeans taper. The line looked straight on the table, but… yeah. Pinned along the chalk line on both legs, hoping it would hold things together.
The Actual Cutting (Sweaty Palms Time)
Took a deep breath. Started cutting slowly, following the chalk line on the first leg. Felt weird cutting good fabric! Went one leg at a time. Key mistake number two: I cut outside the line, figuring I could trim later. Bad call. The fabric shifted a bit under the scissors, even with pins. Finished the first leg, looked okay. Did the second leg, same shaky process. Took the pins out. Held them up. Oh boy. One leg was definitely a smidge shorter than the other. Maybe half an inch? Not tragic, but noticeable if you stare. Also, the lines weren’t perfectly smooth, little jagged bits.
The “Finishing” Touches (Ha!)
Okay, damage control time. Put the shorts on again. The unevenness bugged me. Took them off, laid ’em flat again. Tried to even out the longer leg by carefully trimming tiny bits off, constantly checking. Key mistake number three: Got impatient. Took off a tiny bit too much on one spot trying to fix a jagged edge. Now I had a slight dip. Gave up trying for perfection. Decided to embrace the “distressed” look everyone loves. Took the scissors and made a few tiny vertical cuts near the hem and lightly frayed the edges with my fingernail. Not the clean, cuffed look I imagined, more “I survived a fight with scissors.”
The Final Product & Lessons Learned
Tried them on. Honestly? They look like shorts! Are they perfect? Heck no. One leg is maybe a quarter-inch shorter than the other if you measure, but standing, you can’t really tell. The hem is wobbly. The fraying is… enthusiastic. But they’re comfy! And I saved pants destined for the trash. Big takeaways:
- Measure like crazy, especially remembering the taper. Mark dots all around, not just outside seam.
- Cut INSIDE your marked line. You can always cut more off, can’t add fabric back.
- Sharp scissors are non-negotiable. Dull ones will chew the fabric.
- Go slow, especially around curves. Fabric moves.
- Embrace the wobble. It’s homemade! Distressing hides a multitude of sins.
It was way more nerve-wracking than I thought just cutting fabric, but kinda fun in a messy way. Would I do it again? Yeah, probably. Maybe with less panic next time. Good luck if you try it! Don’t be like me, measure twice, cut once… slowly!