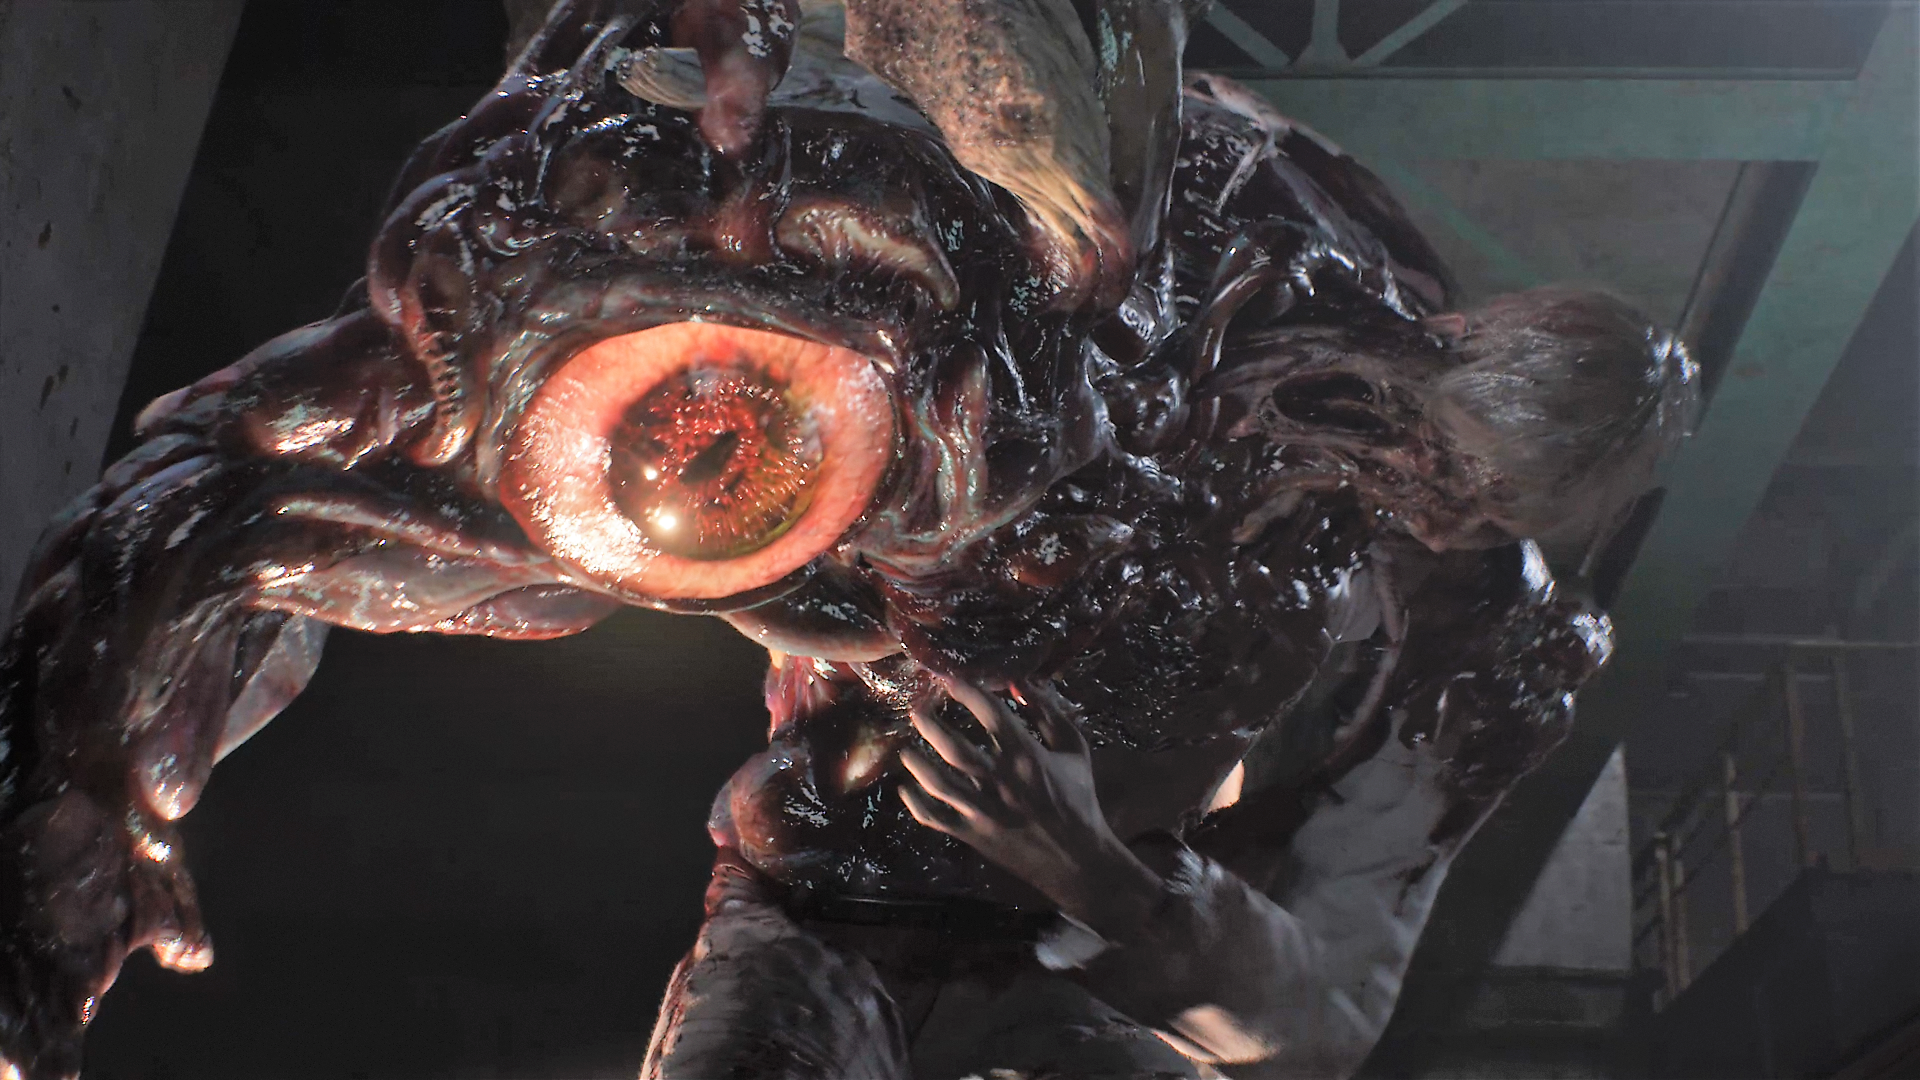
Man, that Birkin fight in the sewers almost made me quit my first run. That giant eyeball monstrosity charging at you? Pure nightmare fuel at first. Totally panicked, sprayed my handgun like crazy, wasted all my ammo, and got smashed flat. Game over screen laughed at me. Ugh.
First Attempts Were Rough
Okay, deep breaths. Restarted the save point just before dropping down into his playground. My next few tries were just embarrassing:
- Got greedy: Saw the big glowing eyeball on his shoulder, thought “SHOOT THAT!”, but stood still too long aiming. Boom. Smacked into the sludge. Dead.
- Ran dry: Used up all my powerful shells for the grenade launcher way too early while he was rampaging. Left with just knives when he got close. Not fun.
- Forgot the crane: Seriously, what’s that big red button doing there? Didn’t connect the dots until later. Played ring-around-the-pillar instead, got cornered, ended badly.
Felt like banging my head against a wall. Needed a plan, not more panic firing.
Figuring Out the Dance Moves
Started watching his patterns. Noticed stuff:
- The Charge: He winds up real obvious, leaning back before launching. That’s the cue to SPRINT sideways, not backwards!
- The Slam: When he raises that stupid giant arm? Time to get out of the splash zone FAST. Learned to run diagonally away.
- The Weak Spot: Yeah, the eyeball is key, but only when he’s stunned or walking slowly. Picking the moment matters.
Also, DUH, finally paid attention to the dang crane controls near the center of the arena. Lightbulb moment.
The Winning Strategy That Stuck
Okay, here’s what finally worked for me, step-by-step:
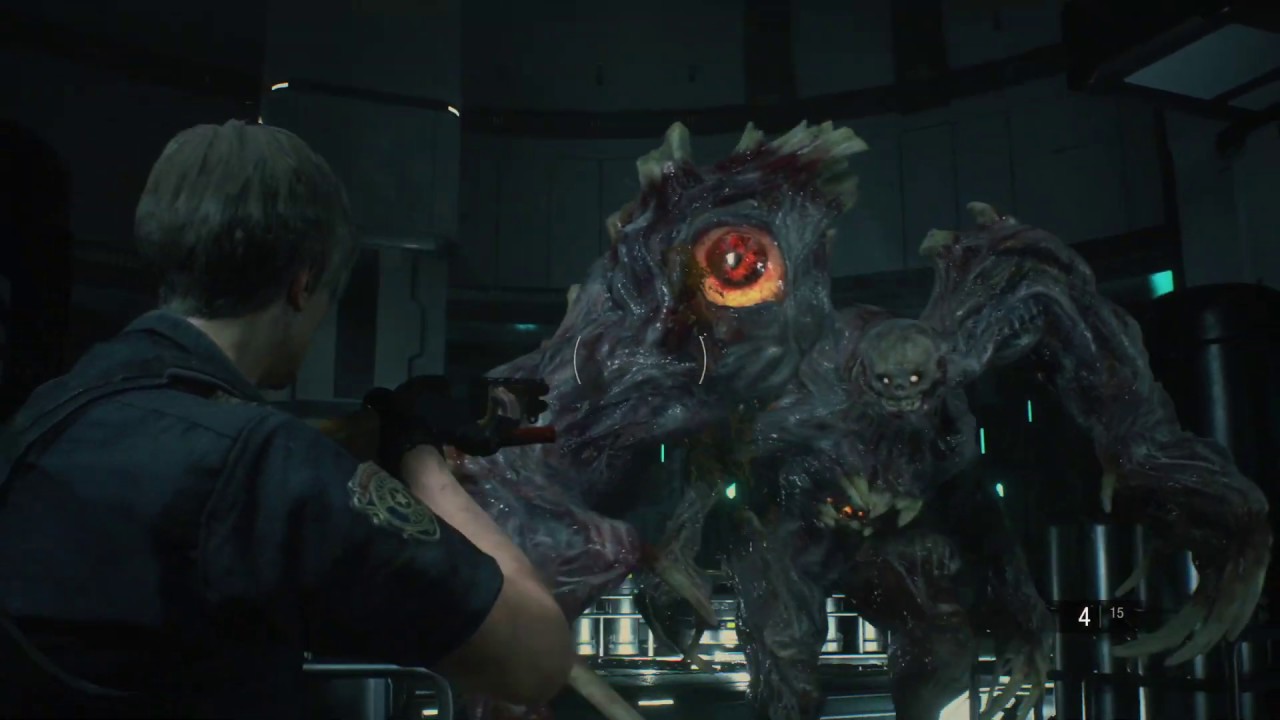
- Open strong: Soon as you drop down, hit him with a couple of Acid Rounds from the Grenade Launcher (maybe 5 or 6 total). Not gonna kill him, but really stuns him good and makes him reveal the shoulder eye.
- Target practice: While he’s staggered from the acid, that eye is wide open. Pulled out the handgun (ammo is easier to find!) and just unloaded on that sucker. You see the chunks fly!
- Ring the dinner bell: Once he recovers and starts rampaging again, BOOK IT towards the big red button under the crane arm. Smack that button! The container swings down and smashes him good. This does HUGE damage. Best part.
- Rinse and repeat: Just keep doing this loop! Acid Rounds -> Blast the Eye -> Run like heck -> Crane Smash. Focus on dodging when you’re waiting for the crane to reset.
- Conserve the good stuff: Saved my shotgun shells for absolute emergencies when I needed space NOW. Mostly stuck to handgun on the eye after initial acid.
Took maybe three good crane hits and consistent eye shots after that. On the last crane smash, he just kind of… melted. Got that sweet, sweet achievement pop-up.
Bottom line: Don’t stand and trade shots with this beast. Use the dang crane! Control the fight, bait him near the button after stunning him, and let the environment do the heavy lifting. Saves ammo, saves health, saves sanity. Took a few tries to get the rhythm, but once it clicks? Birkin becomes WAY less scary. Go get him!